Posted on

Custom Table Top with Rounded Corners UK: Options and Measuring Tips

Custom Table Top with Rounded Corners UK Options and Measuring Tips-Tablemaker

Custom Table Top with Rounded Corners UK: Options and Measuring Tips

Why consider a custom table top with rounded corners?

Rounded corners on a custom table top improve safety and comfort, reduce wear, and help the piece sit more harmoniously in high-traffic or family-focused spaces.

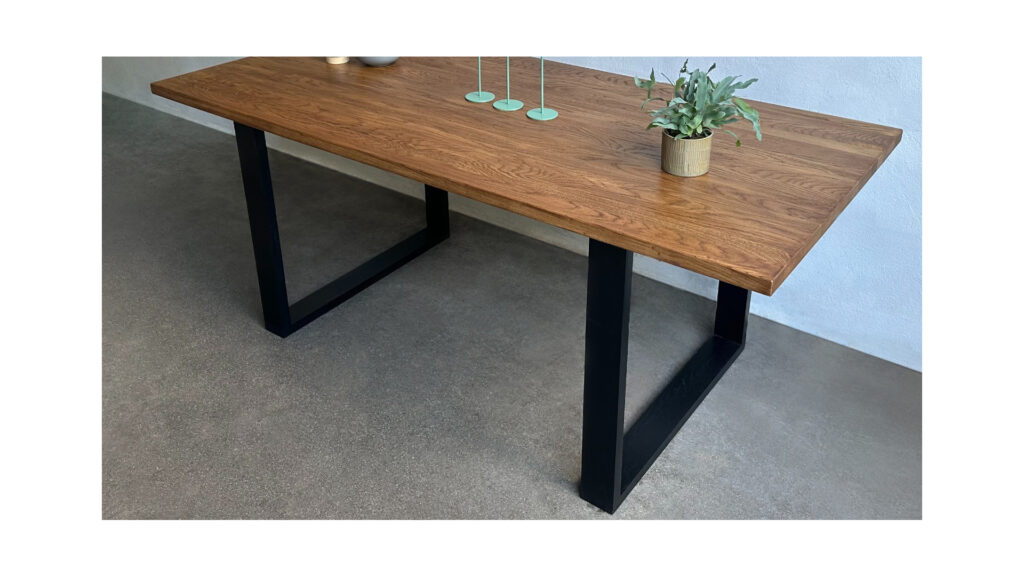
Rounded corners are often chosen for practical reasons that extend beyond appearance. In households with small children, they reduce the risk of sharp impacts. In shared offices or tight dining areas, they allow easier movement around the table without snagging on clothing or bumping into corners. Aesthetically, a soft corner table introduces a sense of calm and flow, particularly in interiors with gentle proportions or organic shapes.

Certain table frames or leg placements also visually benefit from curved corners, creating better alignment with rounded metal legs or tapered timber details. Over time, softened corners reduce the likelihood of chips or impact damage since there’s no sharp angle to bear the brunt of wear.

Rounded corners can also complement other visual elements, such as curved back chairs, oval pendant lamps or other pieces with softened proportions. For clients seeking functional elegance without harsh edges, this detail often makes a subtle but satisfying difference.

Table of Contents

Types of Rounded Corners: Radius Options and Visual Impact

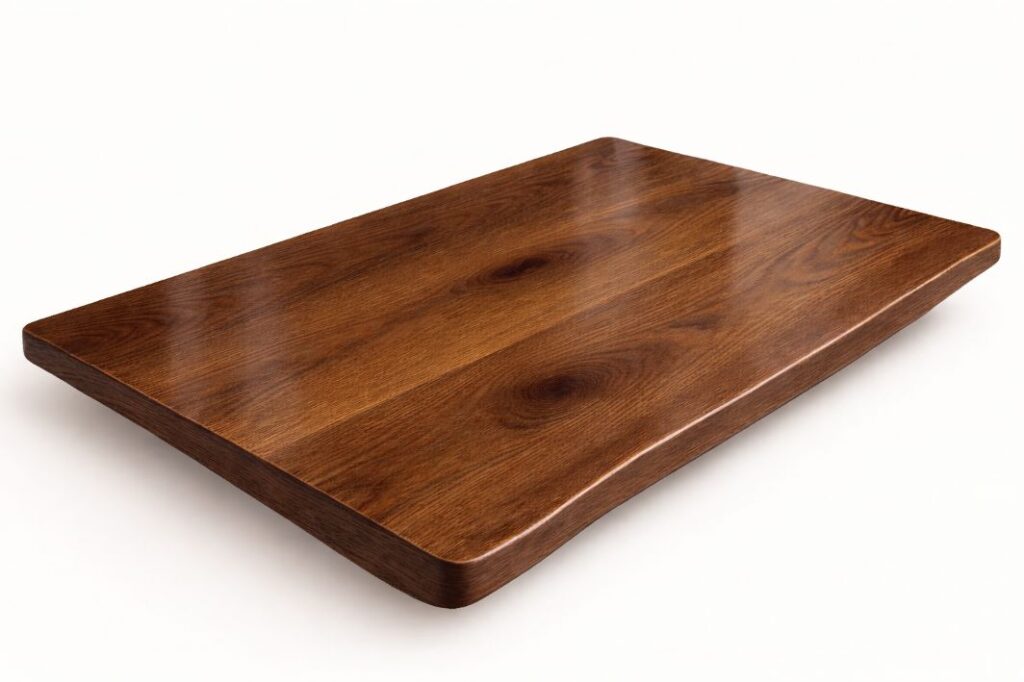
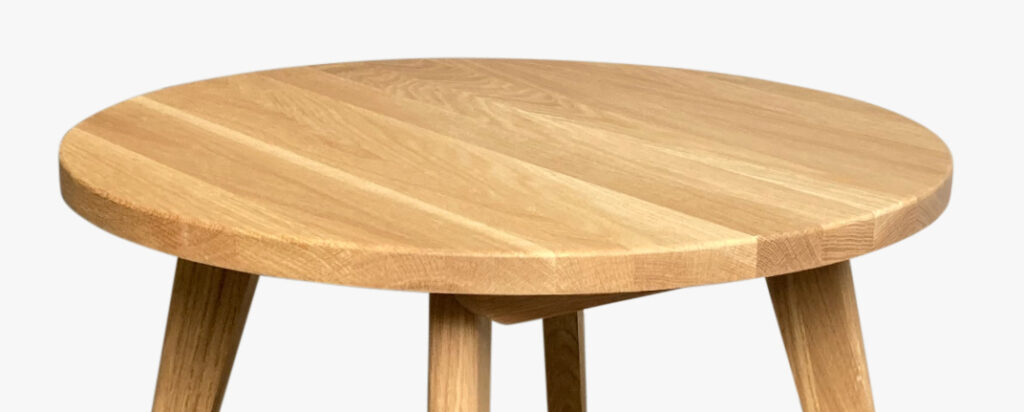
The radius of a corner refers to the size of the curve forming the corner. Even small differences in radius size can shift a table’s look and feel significantly.

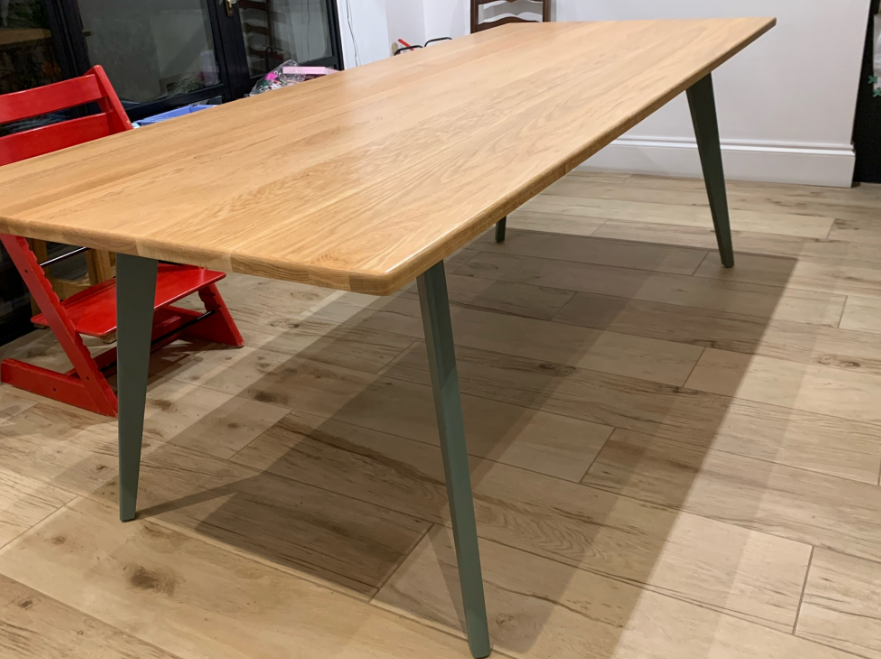
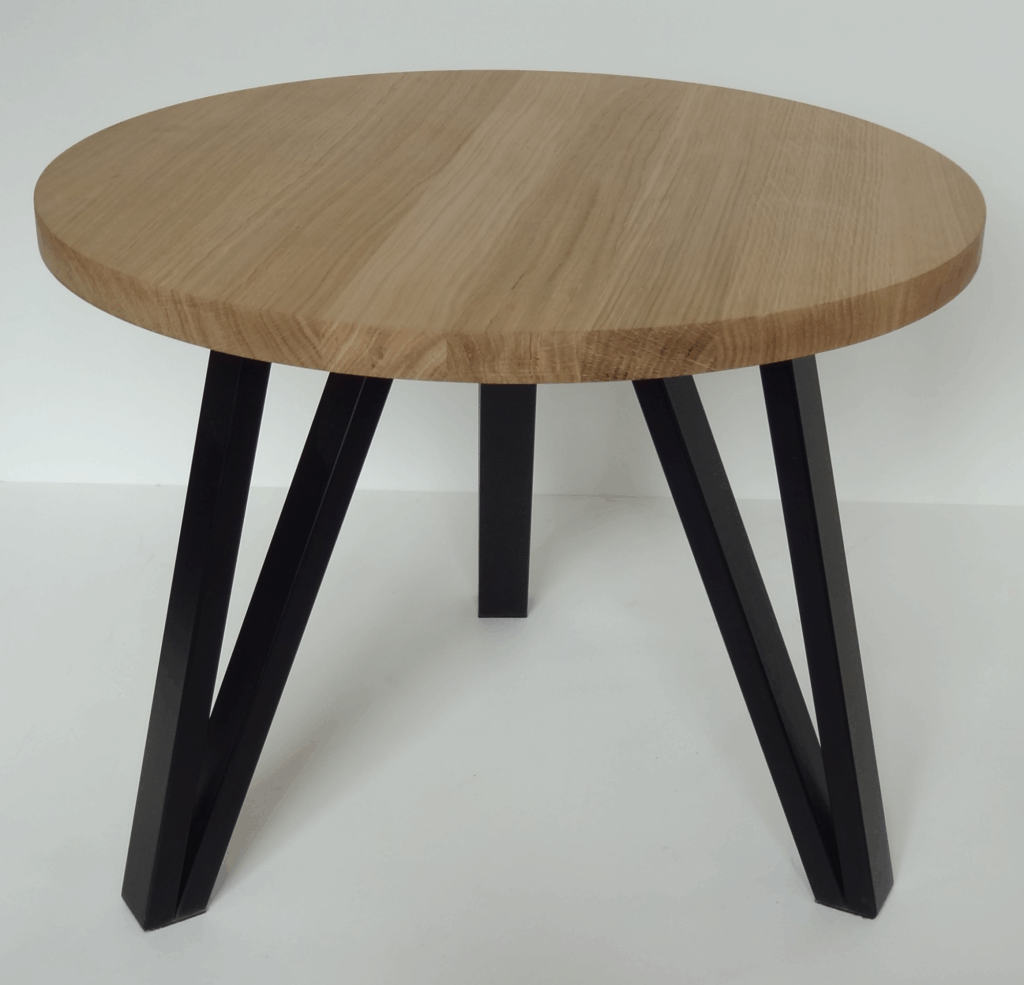
A small radius (10 to 20mm) offers a subtle soften. It takes the edge off the corner without changing the overall square form too much. These work well for modern, minimalist interiors that need a touch of approachability without losing structure.

A medium radius (30 to 60mm) strikes more of a balance. At this size, the curve becomes a visible part of the design without appearing exaggerated. It feels deliberate and blends nicely with rounder elements or lightly tapered legs.

A large radius (70mm and above) introduces a broader sweep. This is closer to a softened rectangle or even oval in perception, especially noticeable on smaller tables or desks. Some clients opt for this in areas with tight turning circles or where the table sits in a passageway.

The table’s overall size impacts how a radius appears. For instance, a 50mm radius on a small square table will feel much stronger than the same on a large dining top. Matching the corner radius to the leg shape or considering the combined effect with the top’s edge profile also helps keep the design cohesive.

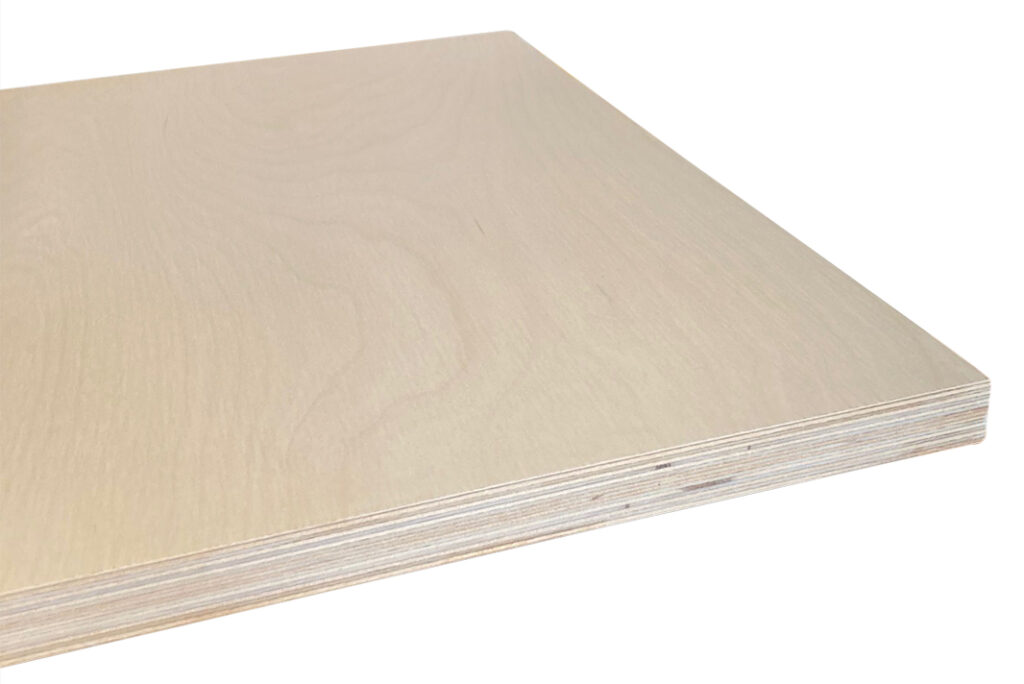
Material Considerations for Rounded Corner Table Tops

Solid wood responds differently to shaping, and that behaviour matters when planning curved corners.

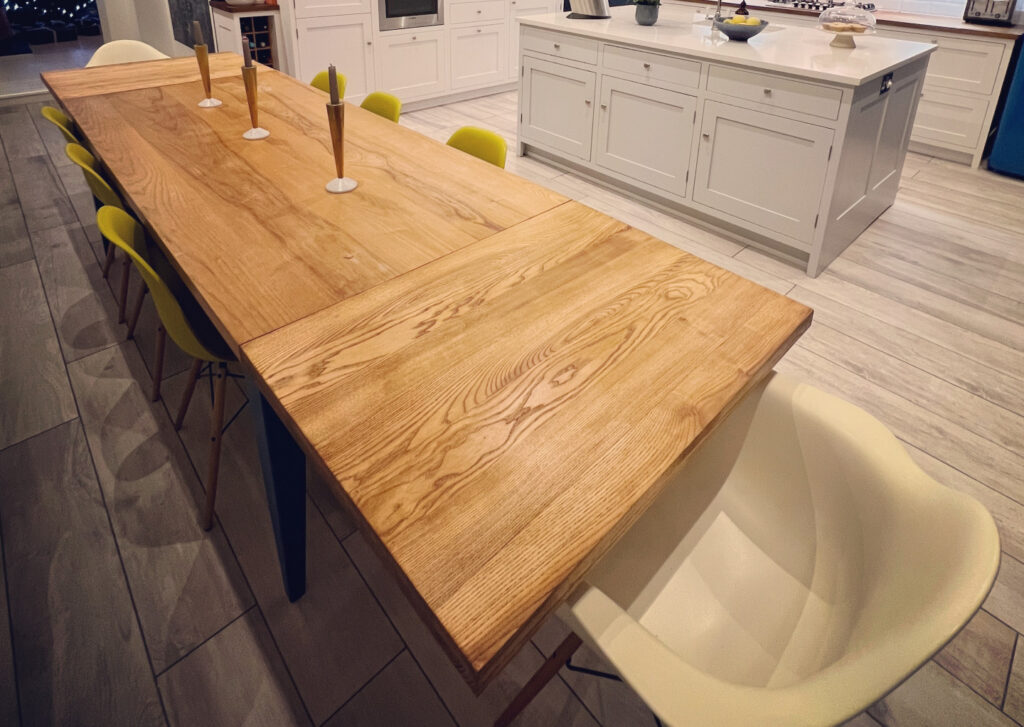
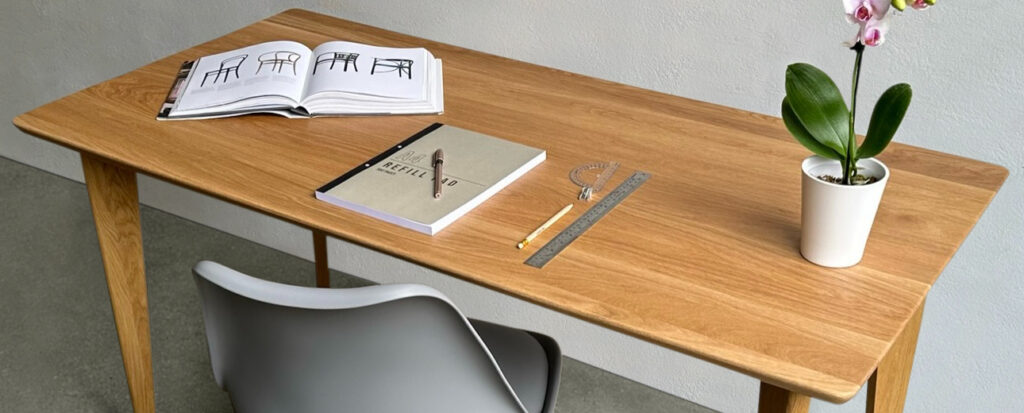
Oak, commonly used in the Tablemaker workshop, is a favoured choice for rounded edges. Its combination of hardness and stability means curves can be shaped cleanly and hold their form well. Oak’s grain also sands to a fine finish, which gives a smooth feel around the curve without fuzziness or splintering.

Ash has a slightly more open grain and a lighter tone. When rounded, the grain movement becomes a design feature, revealing arcs and lines that highlight the shaping. It is easier to work than oak, which sometimes makes it a cost-effective option for wide curves or complex profiles.

Walnut adds warmth and contrast, but its grain structure and natural oil content can make shaping a bit more involved. It accepts curves well but requires experienced handling to avoid chipping near the edges.

In all woods, the grain direction matters. Corners shaped across the grain require careful attention to avoid tear-out or weak spots. A high standard of sanding and a well-chosen hardwax oil finish help protect and deepen the tactile quality, allowing rounded details to hold up under daily use and still be refinished easily if needed.

Pro Tip: Use a flexible curve ruler or printable templates to measure corner radius accurately before ordering.

Pro Tip: When fitting to tight areas like alcoves or near radiators, make a cardboard mock-up to test the footprint.

Measuring for a Custom Table Top with Rounded Corners

Accurate measuring is especially important when corners are curved, as the overall footprint and usable space can differ from a standard square-corner top.

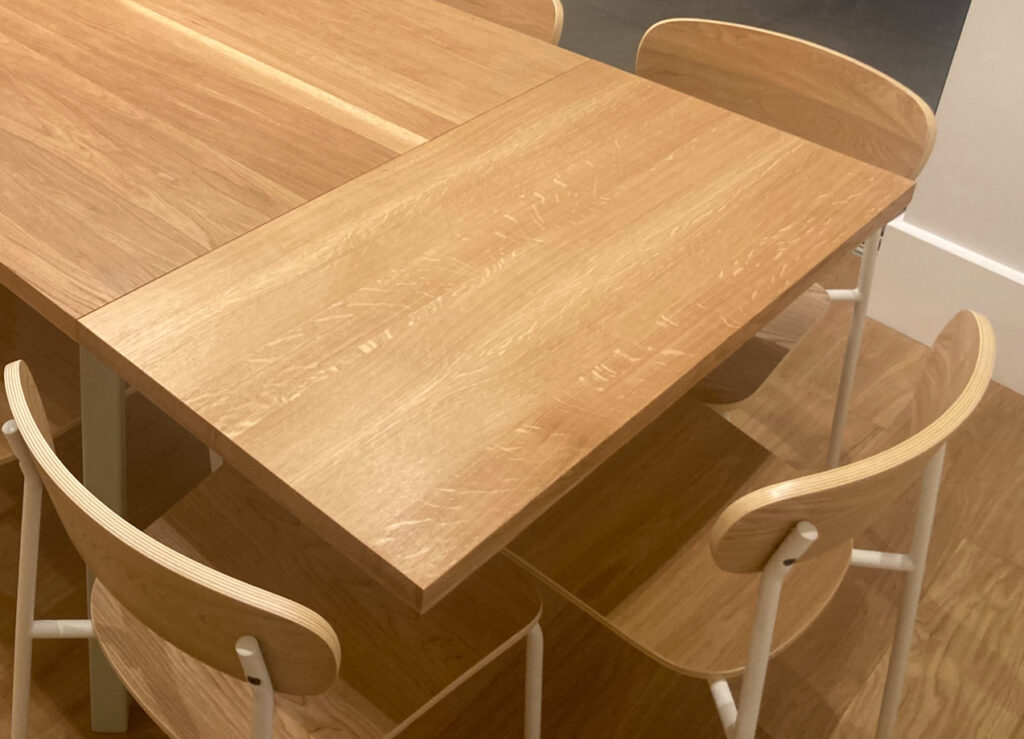
  1. Measure full length and width Define the total footprint of the table, edge to edge, including where the curved corners begin. For example, a 140cm x 80cm top with curved edges still needs those base dimensions confirmed.
  2. Confirm the corner radius If replacing an existing top or matching it to nearby furniture, measure the current corner radius with a template, ruler curve, or even a coin if the curve is small and subtle. On new tops, decide the desired radius and ensure it is clearly noted.
  3. Account for overhangs or fixed points If placing the table top against a wall or fitting it around skirting boards, measure the gap and note any wall obstacles. Similarly, cafe or office installations may need to allow for radiator clearance or socket access.
  4. Fit to a base or legs If mounting to an existing frame, ensure the leg placements do not interfere with the planned corner shaping. Wide curved corners can affect where feet or support brackets attach.
  5. Avoid rounding assumption errors A common mistake is to subtract the radius from the overall table size. On most builds, the corner radius is a cut taken from the corner of the rectangle, not an addition. This affects both aesthetics and fitting.

If submitting measurements for a custom build, provide diagrams or sketches where possible. Even a photo with marked-up dimensions helps clarify your intent, especially when fitting into tight spaces or working with pre-purchased frames.

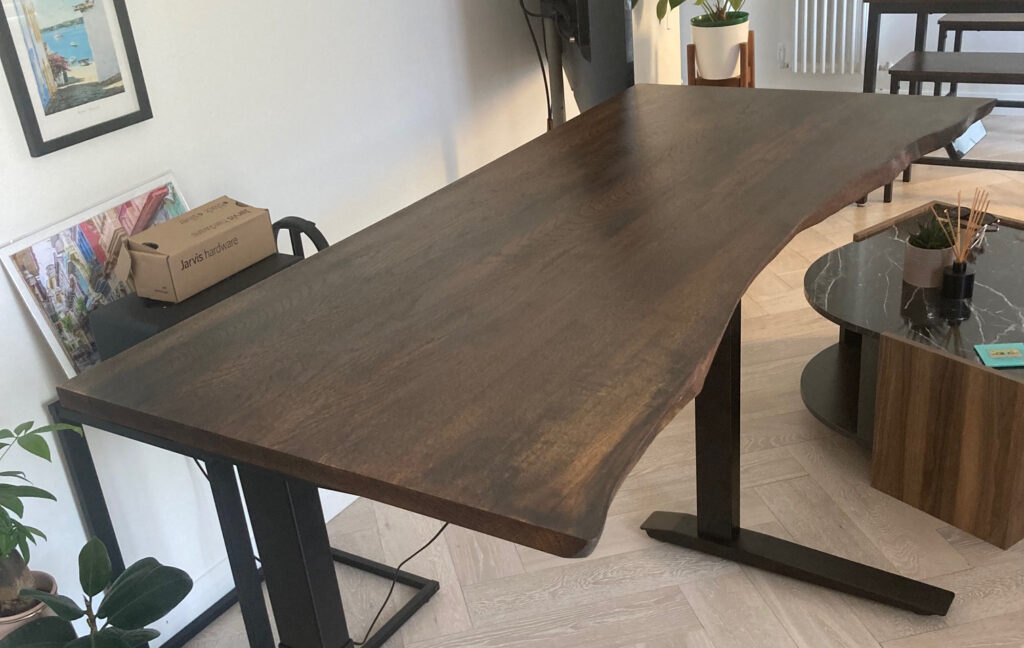
Compatibility with Existing Bases and Frames

One of the main advantages of a made-to-measure top is its ability to work with your specific base. However, a few elements need checking to ensure a smooth fit.

Leg Placement Some bases, particularly those with corner legs or pedestal supports, may require adjustment to match wide corner curves. A strong radius can bring the leg too close to the curve, limiting screw placement or affecting visual balance.

Overhang and Clearance If the base is already installed, consider how the rounded corners affect overhang. In smaller configurations, a curve may change where the edge appears to finish, altering the comfort clearance for seating.

Drilling Tablemaker supplies tops undrilled by default, which gives clients flexibility in positioning the top to suit their base. This is particularly useful with sit-stand frames or custom brackets.

Sit-Stand Compatibility Curved corners work well with desk frames, but users should verify that monitor arms or clamping accessories have enough flat edge space. The front edge is rarely curved, but on compact setups, positioning matters.

In some cases, small adjustments to leg placement or support brackets avoid conflict with corner shaping. The key is to plan ahead based on the full table footprint and the working area of the base.

Start Your Custom Table Top Order

Share your measurements and wood preferences to begin a tailored build with our team.

Request a quote

Edge Profiles and Finishing Options for Rounded Tops

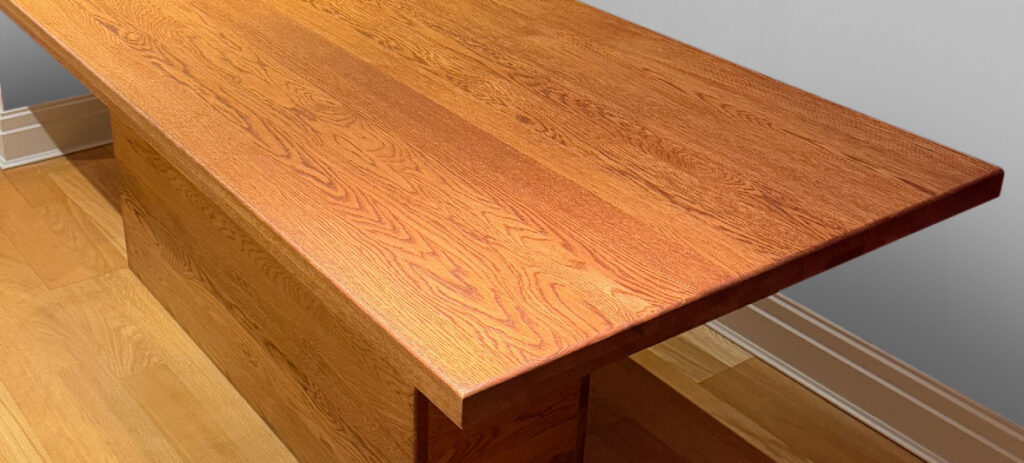
Once corners are curved, the choice of edge profile affects both comfort and visual flow.

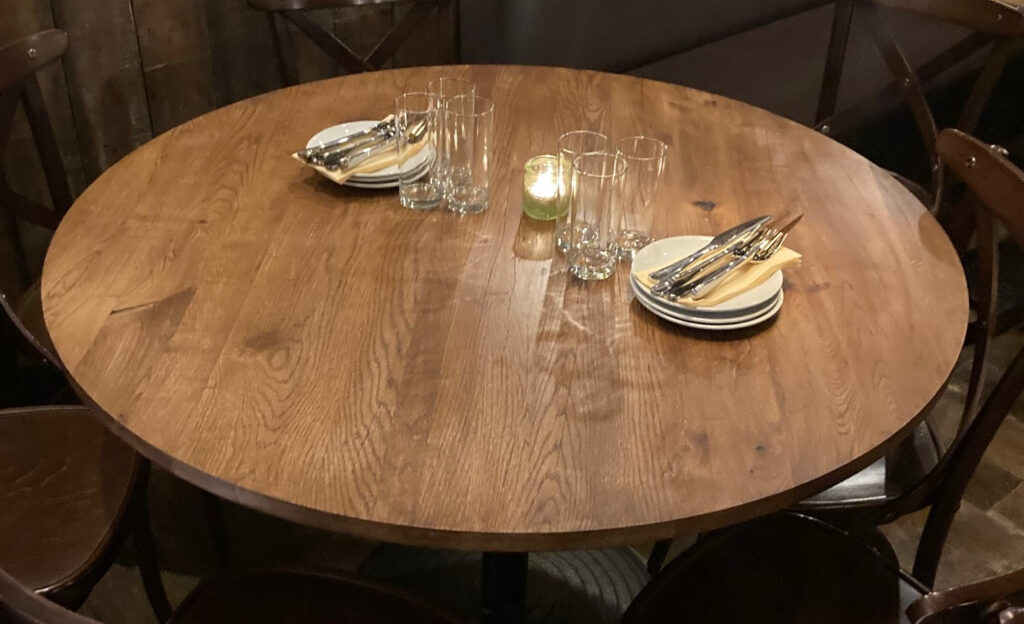
Chamfered Edge A bevelled cut along the edge creates a crisp line while relieving the sharpness. It pairs well with smaller-radius corners and gives a modern but not harsh appearance. Cleaning is straightforward, though the edge can show wear faster than rounder profiles.

Rounded Edge (Radius Edge) A uniform round-over along the edges creates soft continuity with the rounded corners. This profile is especially comfortable for forearms and suits casual dining or shared working environments. Dust is less likely to collect along the edge, and finish longevity tends to be higher.

Bullnose Edge More deeply curved than a standard radius, the bullnose wraps the full edge thickness with a semicircular form. This has a strong presence and works well on chunkier tops. It is comfortable, traditional in feel, and lower-maintenance, though it may draw visual attention depending on context.

Matching the edge profile to the corner radius ensures a smooth line throughout the piece. In some cases, subtle transitions are introduced to balance a strong corner curve with a lighter edge detail. Sanding quality and oil selection further influence how the profile looks and feels in use.

When to Choose a Fully Bespoke Solution

Standard corner options and sizes cover needs. However, certain situations call for a custom approach from the outset.

Examples include:

  • Irregular spaces such as under-stair nooks, alcoves or loft eaves
  • Fixed obstacles like radiators, beams or cable trays that require shaping or cut-outs
  • Matching existing furniture with non-standard proportions, especially leg spacing or materials
  • Cable management requirements for offices or shared home desks
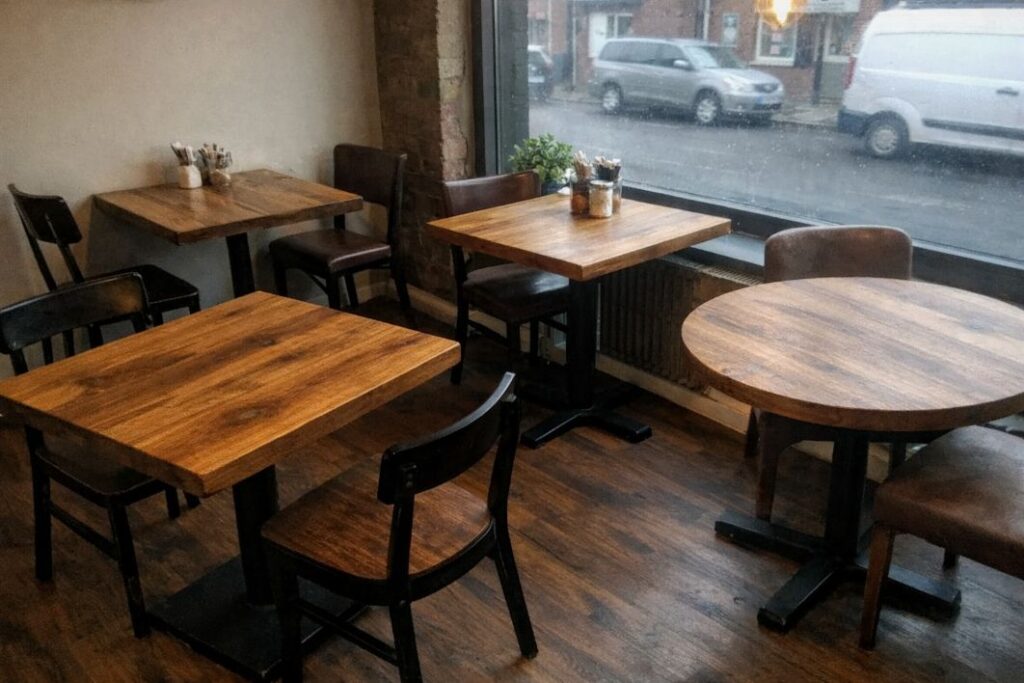
  • Commercial layouts where multiple sizes need to align or join across a continuous space
  • Combined challenges, such as integrating a sit-stand frame, shared users and a defined corner radius

In these cases, commissioning a made-to-measure piece ensures nothing is compromised for the sake of standardisation. A well-briefed workshop can advise on trade-offs early, supply the top ready for fitting, and guide adaptations along the way.

At Tablemaker, many bespoke projects begin with a sketch or constraint, not a fixed design. The process is practical, not precious, and focused on solving fit, function and finish without unnecessary challenge.

Need Help Measuring Your Space?

Send us photos or a sketch and we will assist with radius choices and fit guidance.

Get measuring support

Tablemaker

55 High St, London N8 7QB

02083416334

HVQM+58 London


Posted on

Where Can I Order a Solid Wood Table Top Online in the UK?

Where Can I Order a Solid Wood Table Top Online in the UK-Tablemaker

Where Can I Order a Solid Wood Table Top Online in the UK?

What is considered a solid wood table top and why does that matter?

A solid wood table top is made entirely from timber, without veneers, fillers or composite cores. This matters because solid wood can be repaired, refinished and used for decades, unlike veneered MDF or chipboard which is prone to delamination and cannot be sanded.

What “solid wood” really means online

Online listings can be confusing, with product titles often describing items as “oak,” “wood effect” or “real wood,” even when the surface is a thin veneer over engineered board. True solid wood tops use full sections of timber glued edge to edge. These are often referred to as full-stave tops, meaning the grain runs the full length without splicing.

By contrast, veneered boards may have a decorative layer bonded to an MDF or chipboard core. While these can look convincing at first, they lack the structure and toughness of real hardwood.

Here is a simple comparison to guide you:

  • Solid wood (full-stave construction): Entirely hardwood, fixable, long-lasting, can be sanded multiple times
  • Veneered MDF or chipboard: Thin wood surface over engineered board, not repairable, easily damaged by moisture or heat

Grain direction, stave width and wood movement are key design choices. A high-quality top will consider these factors to minimise issues like cupping or warping over time.

When ordering, look for honest descriptions that mention construction details, such as full-stave oak, straightening bars or kiln-dried timber. British woodworking standards and FSC-certified sources also indicate responsible material sourcing.

Understanding what you are buying is the first step to making sure it will last more than a few years.

Table of Contents

Why Order a Table Top Separately?

Buying just a table top can be more sensible than ordering a full piece of furniture, particularly if you already have a base or frame. This approach gives you flexibility without compromising quality.

Reusing existing frames You may already have a metal or wooden base that is structurally sound but needs a better surface. A standalone top lets you upgrade without replacing the entire table.

Fitting unique spaces Irregular corners, limited access routes or existing cut-outs can make full tables impractical. Ordering a top only allows precise sizing to work around awkward layouts or installed features.

Sit-stand compatibility If you use a height-adjustable frame, many off-the-shelf desks come attached to their tops. A separate solid wood top can be mounted cleanly to your current setup, especially if supplied undrilled like those from Tablemaker.

Sustainability and lifecycle thinking Replacing just the surface reduces waste compared to binning an entire piece of furniture. Solid wood can also be refinished to last across multiple frames or settings.

Simpler upgrades or replacements If your usage changes, you can reuse the base and fit a different top for a new size or finish without buying from scratch.

Ordering only the top shifts your focus onto quality materials and practical function, rather than fitting within a narrow range of pre-built table models.

What to Consider Before Ordering Online

Solid wood lasts, but it is not one-size-fits-all. Before committing to an online order, think through the key details that will determine how well your new top fits and performs.

  1. Measure precisely Account for base footprint, overhang, room layout and wall clearances. Use a tape measure rather than estimating from photos or old receipts.
  2. Check frame compatibility If you are reusing a base, check its mounting points and support structure. Solid wood is heavier than engineered boards and may need stronger fixings.
  3. Choose a wood type and finish Oak is common for good reason, offering strength and a balanced grain. Ask about finish options too. Hardwax oil, for example, provides a durable surface that can be spot-repaired as needed.
  4. Pick a suitable thickness Most tops are around 2.5 to 4 centimetres thick. Thinner tops can flex or feel insubstantial. Thicker ones are more stable but heavier. Talk to the supplier if unsure.
  5. Allow for cable and component access For desks, consider whether you need routing for cables, grommets or mountings. Many UK suppliers provide undrilled tops as standard so you can position fixings precisely.
  6. Understand the lead time Made-to-order does not necessarily mean months of waiting, but it helps to plan ahead. Clear production timelines improve confidence.
  7. Check delivery format and options Solid wood tops are bulky. Ask how delivery is handled and whether collection is possible. Some workshops provide protective packaging suited for direct courier delivery.

Covering these basics will reduce frustration and significantly increase the chance of a well-fitting, reliable piece.

Where to Find UK-Based Makers and Suppliers

Choosing a UK-based workshop has practical advantages, from shorter lead times to easier communication. But how can you tell who is really making what they sell?

Benefits of local makers

By ordering from a UK workshop, you improve delivery speed and reduce import risk. You can also talk directly to the maker or workshop team if something needs to be adapted, which is especially useful for complex or custom orders.

What to look for on a supplier’s website

  • Clear product descriptions with construction detail
  • Custom size configurators or ordering tools
  • Information on how the tops are made
  • Direct contact options such as workshop phone or email
  • Location and delivery terms visible upfront

If a site offers an unusually broad range of furniture and décor items, it may be a retailer or reseller rather than a maker. This does not always mean lower quality, but it adds a layer between you and the people producing the top.

Tablemaker, for instance, operates its own UK workshop with a made-to-order model. Orders are typically produced in about two to three weeks, reflecting a balance between quality finishing and timely service. Their product range focuses on tops and compatible furniture, which means sizing and compatibility are considered from the outset.

When buying online, that kind of singular focus often signals reliability.

Pro Tip: Always ask whether the wood is kiln-dried, as this significantly reduces the risk of future warping.

Pro Tip: If reusing an existing frame, photograph its underside to check fixing points before ordering a new top.

Custom vs. Ready-to-Buy: Which Is Right for You?

Not every need calls for full customisation. Most reputable suppliers offer a range of standard dimensions that will suit many users.

When standard sizing works

If your space is straightforward and your base uses a common frame size, choosing a ready-set dimension keeps things simple. Workshops like Tablemaker offer these in 1cm increments, which allows a precise fit with minimal delay.

When custom makes sense

Some situations call for adjustments. Examples include:

  • A non-standard metal base from a vintage table
  • A workspace that must avoid a radiator or window sill
  • Matching a cut-out for cables, shelves or structural posts
  • Aligning with fixed bench seating or built-in features

In these cases, custom work allows the top to function properly without forcing a compromise elsewhere. It may involve longer lead times, but not always substantially.

Balancing options

Generally, if a standard size comes within a couple of centimetres of what you need, you may find it sufficient and faster to receive. If precision matters more, for layout, aesthetics or comfort, custom is the way to go.

The choice depends on how fixed your constraints are and how visible or functional any mismatch would be.

How Lead Times and Delivery Work for Made-to-Order Tops

Many online buyers assume bespoke equals slow, but that is not always the case. In some UK workshops, made-to-order projects are delivered within just a few weeks.

Typical production times

Workshops that control their own processes, such as Tablemaker, typically produce most orders in two to three weeks. This includes planing, assembly, finishing and packaging.

Standard size orders may move slightly faster, while complex custom projects can take a little longer.

Delivery and collection

Solid wood tops are often delivered via courier services suited to large packages. Protective cardboard and edge guards are commonly used. Some workshops offer van delivery for local areas or allow collection by appointment, depending on location.

What affects turnaround time

  • Level of customisation
  • Number of concurrent orders
  • Type of finish requested
  • Workshop capacity during seasonal peaks

A clear order confirmation outlining the timeline helps avoid surprises. Avoid rushing the process if precision or quality is a priority.

Speak to a Specialist

Have questions about sizing, timber types or delivery options? Speak to a UK-based expert who can guide your decision.

Contact a Specialist

Caring for and Maintaining a Solid Wood Table Top

Solid wood is durable over time, but it benefits from regular care. Treated properly, your top can last for decades and even improve with age.

Daily care routine

  • Wipe with a damp cloth and dry immediately
  • Avoid standing water, spills or damp cloths left on the surface
  • Use coasters or mats under hot or wet items
  • Never use harsh chemical cleaners or abrasive pads

Hardwax oil protection

Most quality tops, including those from Tablemaker, use hardwax oil as a finish. This combines durability with repairability. You can gently sand and reapply oil when the surface dulls or shows wear, rather than replacing the whole piece.

Refinishing and repair

Minor dents, scuffs or marks can often be addressed with light sanding and an oil top-up. More detailed damage may require more thorough sanding, which solid wood allows.

Moisture, uneven base support or heat can still cause damage, so prevention remains the best approach. However, with basic care, your table or desk top will continue to perform and age well over time.

A solid wood surface reflects its use, not just its appearance. The ability to maintain and refinish it is part of what makes it a worthwhile investment.

Custom Table Top Quote

Looking for a specific size or cut-out design? Request a tailored quote from a UK workshop for a made-to-order solution.

Request a Custom Quote

Tablemaker

55 High St, London N8 7QB

02083416334

HVQM+58 London


Posted on

Can I Send You a Sketch for a Custom Table Top? UK Ordering Guide

Can I Send You a Sketch for a Custom Table Top UK Ordering Guide-Tablemaker

Can I Send You a Sketch for a Custom Table Top? UK Ordering Guide

Can I send a hand-drawn sketch for a custom table top in the UK?

Yes, a sketch is welcomed and often helpful when ordering a custom table top in the UK. It does not need to be technical or artistic, and just clear enough to show your design intent, measurements and any specific needs you have for your space or frame.

Table of Contents

A Simple Sketch Can Go a Long Way

You do not need to be a designer, draughtsperson or artist to provide a useful sketch. A hand-drawn plan, even on paper with rough markings, can be valuable. It gives the workshop something tangible to interpret, helping turn your idea into something buildable.

A sketch can communicate:

  • Overall shape and edge layout
  • Important cut-outs or features such as cable gaps
  • Overhangs or frameless areas that need to be accommodated
  • Notes about what the top will sit on or fit within
  • Preferred positioning of features like grommet holes or mounting cleats

Photos of the intended space or base, sent alongside a sketch, can add further clarity. A sketch is not mandatory, but it often reduces back-and-forth and makes communication easier for everyone involved.

What to Include in Your Sketch or Drawing

If you’re sketching your idea, here’s what to include to help the workshop interpret it clearly:

  1. Overall dimensions in millimetres or centimetres
  2. Shape layout (rectangle, oval, round, or L-shaped, for example)
  3. Location and size of any cut-outs (for cables, radiators or corners)
  4. Notes on which edge is the front or back, if important
  5. Any known mounting points or frame leg positions
  6. Optional: desired grain direction, edge profile or finish preference

Adding a few explanatory notes can make a drawing much more informative. If possible, include photographs of the base or the room, especially if the table will need to fit around something specific.

Pro Tip: If your frame includes predrilled holes, referencing the manufacturer’s mounting pattern can save time and avoid errors.

Pro Tip: Photograph your existing space or base from multiple angles to give the workshop helpful context alongside your sketch.

How Custom Table Tops Are Interpreted and Built

Once your sketch arrives, the workshop begins by reviewing the drawing to understand your intent and check practical alignment with material limits and construction logic.

Initial review Your sketch is opened and assessed for completeness. If anything is unclear, you’ll be contacted with specific questions. The aim is to clarify the essentials without requiring redrafting.

Material planning Solid timber is selected, usually kiln-dried oak, with full-length staves arranged for surface stability and appearance. Grain direction is chosen to suit type and layout.

Construction logic Standard reinforcement includes straightening bars fitted across the grain to minimise movement over time. These are positioned based on size and mounting needs.

Final confirmation You’ll receive a spec confirmation with the discussed measurements, and any adjustments agreed on. Nothing is cut until this stage is signed off.

This process keeps your original idea intact while aligning it with practical build methods and long-term durability.

Materials, Thicknesses and Finishes: What You Can Choose

Several key decisions shape how your custom table top looks, performs and wears over time.

Wood type Oak is the default option due to its durability and ability to be repaired or refinished. Other hardwoods can be discussed for specific projects.

Thickness Common choices range from 27mm to 40mm thick. A thicker top has more presence and tolerance for future surface sanding, while a slimmer top may suit smaller spaces or lighter frames.

Finish Hardwax oil is used as standard. It enhances the grain and provides surface protection without forming a plastic-like coating. It is also easy to refresh yourself with spot repairs or a full resand down the line.

Edge profiles You can request square, rounded or chamfered edges. These are often indicated in sketches or notes and can be adjusted depending on the intended use.

Each of these contributes to how the piece will age, handle wear and suit the space it lives in.

Sizing for Fit: Working with Existing Bases or Spaces

Many custom tops are made to fit an existing base or within a particular space. Some details are useful to get right early on.

  • If you have a fixed-leg metal frame, measure the inner and outer leg positions
  • For sit-stand frames, include the mounting dimensions and whether the top will overhang
  • In alcove or wall-adjacent setups, be precise about wall-to-wall measurements
  • Allow space for cables if desks are plugged in against a wall
  • Consider notching or adapting corners for radiators or uneven plasterwork

Precision to the nearest centimetre can make the difference between a satisfying fit and an awkward compromise. Most tops from Tablemaker are made to exact metric sizes, so 1cm increments are possible but expected.

If your frame has predrilled holes, a photo or link to the manufacturer’s mounting template may eliminate the guesswork.

Start Your Custom Table Top

Send your drawing or notes to begin the design process with the Tablemaker team.

Send My Sketch

Sending Your Sketch: Formats, Files and Contact Methods

Sending your sketch is straightforward. It does not need to be a digital file or a technical drawing.

Acceptable formats include:

  • A photo of your hand-drawn sketch (taken on a phone is fine)
  • Scanned drawings or PDFs
  • Simple digital mockups or annotated photos
  • Emails with dimensions and notes, even without a visual, where necessary

You can attach your sketch, describe your idea and include any relevant photos when contacting the workshop. Supporting notes such as intended use, special concerns or questions can help guide the first response.

Once received, the workshop will assess your submission and follow up with clarification or firm proposals if needed.

Lead Times, Confirmations and What to Expect After Sending

Once your sketch is sent, everything proceeds with a clear and measured process.

Initial reply You will typically receive an acknowledgement within a working day or two. Any questions will be sent at this point to clarify your sketch or intent.

Final confirmation Before anything is made, you’ll be asked to approve a final spec. This usually includes size, timber type, finish, and any mounting details.

Production and delivery Most custom tops are delivered within two to three weeks after confirmation. This includes the time to build, finish and prepare your top for delivery or collection.

Adjustments are possible until the design is confirmed, so you are encouraged to explore what works best. The process is collaborative and responsive rather than automated.

The Tablemaker workshop treats each submission as a long-term surface that needs to function daily, not just look good on arrival. Your sketch, however simple, is the starting point for something made to last.

Explore Material Options

See available hardwoods, edge styles and finishes for your made to order top.

View Material Choices

Tablemaker

55 High St, London N8 7QB

02083416334

HVQM+58 London


Posted on

Custom Table Top to Fit My Existing Base UK: What You Need to Measure

Custom Table Top to Fit My Existing Base UK What You Need to Measure-Tablemaker

Custom Table Top to Fit My Existing Base UK: What You Need to Measure

How do I measure my existing base to order a custom table top in the UK?

To order a custom table top that properly fits your existing base, you need to identify your base type, measure its footprint, check mounting points, determine ideal overhang, consider thickness, allow for wood movement, and review all measurements before ordering. Accurate information at each step ensures both functionality and comfort.

Table of Contents

Identify the Type of Base You’re Working With

Not all table bases support tops in the same way. Before measuring anything, it is important to understand what type of base you have, since its form and support points will directly affect the dimensions and mounting details of the new top.

Here are some common base types and what to look for:

Pedestal Base A single central column, sometimes with feet extending outward. These rely on a well-balanced top and benefit from an even weight distribution. Overhang should be carefully balanced to avoid tipping.

Four-Leg Base Each corner has an individual leg. Support points are usually predictable, but matching the shape and proportion is important to ensure both balance and comfort.

Trestle Base Consists of two or more support points connected horizontally. Trestle bases often accommodate longer tops and are common in shared or bench-style seating arrangements. Mounting is typically done through the rails.

Metal Frames (including Sit-Stand Mechanisms) Often adjustable and sometimes lacking standard fixing points. These frames may require measuring bracket positions and confirming alignment. Cable clearance, lifting movement, and motor housing all affect compatibility.

Vintage or Modified Bases Older bases may use non-standard joinery or have previously attached tops permanently altered. Look for existing fixings, potential warping, or irregular mounting locations.

If the base shows signs of instability, warping or significant rust, it may not be suitable for reuse without restoration.

Measure the Overall Footprint of the Base

The footprint is the width and depth of your base as it sits on the floor. This determines the minimum size your new table top should be to ensure aesthetic balance and safe use.

Follow this practical measurement process:

  1. Use a tape measure to record the widest point from side to side (width).
  2. Measure front to back across the deepest support points (depth).
  3. If the base has curved or angled legs, confirm where the top begins to taper and measure slightly beyond to avoid underestimating the footprint.

The finished top should typically exceed the base by a modest overhang on each side. For dining and shared desk use, an overhang of 20 to 30 cm per side is standard. On narrow or wall-facing bases, smaller overhangs down to 10 cm may be preferred. The idea is to ensure comfort without making the top feel disconnected from its base.

Avoid the common mistake of measuring only the frame edges or legs. It is the outer support points that matter most for top stability.

Pro Tip: When working with metal frames, photograph bracket locations before measuring so you can double-check positions later.

Pro Tip: For vintage bases, lightly sand fixing areas to check for hidden screw holes or non-visible mounting wear.

Check for Mounting Points or Fixing Requirements

Once the dimensions are set, it is important to consider how the top will attach to your base. Without a proper fixing plan, movement over time could damage joints or reduce comfort.

Check the following:

  • Are there existing fixing points? Look for brackets, slot systems, or screw plates.
  • Is the frame adjustable or moving? Sit-stand bases, in particular, require attention to bracket alignment, wire clearance and lift range.
  • Is the underside of the top flat and accessible? Tablemaker supplies tops undrilled by default, which means they can be matched to almost any base with suitable clearance and flat mounting planes.
  • Measure bracket lengths and spacing. If your frame has pre-set bracket holes, record their position, both width and depth, so they can align with either drilled holes or allow for safe screw placement.
  • Are straightening bars or battens needed? Some larger tops need additional structure on the underside to prevent warping. These are usually compatible with most bases but may affect how fixings are applied.

If your base has no fixing points, the table top must be attached through new brackets or grip pads. In either case, ensure a secure but flexible fit that allows for natural wood movement.

Determine Ideal Overhang for Function and Comfort

Overhang affects much more than appearance. It defines how people sit, move and use the table over time. A good overhang provides legroom, ergonomic comfort and visual proportion.

Here are typical overhang ranges based on use:

Dining Tables Aim for 25 to 30 cm of overhang on all sides. This allows for seating comfort without exposing guests to table legs or encroaching supports.

Desks and Work Tables Front edges usually benefit from 10 to 20 cm of overhang to prevent bumping knees on crossbars. Minimal overhang at the rear can help with cable management or monitor stands.

Benches Match the overhang to user height and base width, typically 5 to 10 cm. Too much overhang risks balance shifts or instability.

Shared Workspaces Where people move between seats or use the surface collaboratively, reduce side overhang for ease of movement, but maintain at least 20 cm at the front for comfort.

Flush or minimal overhang may suit modern or compact spaces but should be planned carefully to avoid visual imbalance or reduced comfort.

Order Your Custom Table Top

Get a bespoke top made to your exact base measurements using high-quality timber and expert craftsmanship.

Get a Quote

Account for Table Top Thickness

Thickness plays a subtle but important role in how a table feels, functions and connects to its base. It also affects how mounting hardware sits and how much space remains beneath for legs and cables.

Here is what to consider:

  • Standard thickness Most solid wood tops fall between 2.5 cm and 4 cm. Tablemaker offers these as standard, with options for thicker tops if required.
  • Visual weight A 2.5 cm top often looks lighter and suits smaller dining spaces or desks. A thicker top above 4 cm carries more presence and pairs well with bold or heavy bases.
  • Hardware clearance On sit-stand desks or crossed braces, thicker tops may require thinner fixings or recessed brackets to preserve leg clearance.
  • Structural constraints Thickness affects how a top resists flexing or cupping. Straightening bars are used to preserve long-term stability, especially on wider tops.

Choosing the right thickness is about matching feel and function, not following trends or assuming thicker is better.

Consider Wood Movement and Expansion Gaps

Solid wood expands and contracts with seasonal humidity, mostly across the grain. A well-made table allows for this natural behaviour to prevent warping, splitting or joint failure.

Here is what that means for your measurements:

  • Allow for side-to-side movement Expect 2 to 5 mm of expansion per metre of width across the grain. A top that fits snugly today may bind or bow in summer.
  • Use floating fixings If supplied or requested, slotted brackets or battens hold the top securely while allowing lateral movement.
  • Leave margin near walls or tight corners A tight fit against fixed elements can lead to unwanted pressure on the table frame or adjacent furniture.

Tablemaker uses kiln-dried timber and straightening bars to reduce the impact of movement over time, but it cannot be eliminated entirely. Your measurements should include minor allowances for expansion whenever the top will be enclosed or heavily fixed.

Final Checklist Before Ordering a Custom Top

Before placing your order, review the following points to ensure that all relevant measurements and requirements have been considered:

  1. Confirm your base type and its structure.
  2. Measure the full footprint width and depth, not just frame edges.
  3. Decide ideal overhangs based on intended use and base support.
  4. Check for mounting brackets or existing fixing points.
  5. Measure all relevant spacing between brackets or crossbars.
  6. Choose a thickness that suits your base and comfort level.
  7. Allow for seasonal wood movement when planning fit.
  8. Ensure the underside of the base aligns with mounting needs.
  9. Double-check your list and sketch or note key dimensions clearly.
  10. Consider reaching out to the workshop if your base is non-standard.

Tablemaker supplies tops undrilled as standard to support broad compatibility, but measurements must be precise and well-matched. If you have doubts or an unusual frame, the workshop can advise on best fit methods or minor adaptations.

Taking the time to work through these checks helps ensure your custom top arrives ready to perform, both visually and practically, for many years to come.

Speak to a Tablemaker Expert

Have an unusual base or need clarification on fitting? Our team can guide you through the best mounting options.

Ask an Expert

Tablemaker

55 High St, London N8 7QB

02083416334

HVQM+58 London


Posted on

Made to Measure Table Top UK: How It Works (Sizes, Edge, Finish, Delivery)

Made to Measure Table Top UK How It Works (Sizes, Edge, Finish, Delivery)-Tablemaker

Made to Measure Table Top UK: How It Works (Sizes, Edge, Finish, Delivery)

What does “made to measure” mean for a table top?

A made-to-measure table top is one that is built to specific size requirements rather than standardised dimensions. Unlike fully bespoke furniture, which may involve one-off design for shape or structure, made-to-measure focuses on precision sizing, edge style and finish, offering flexibility within an established construction format. This approach allows the table top to fit particular spaces or bases without the cost or wait associated with full custom builds.

Sizing flexibility without full customisation

Standard furniture often comes in fixed lengths and widths, typically rounded to the nearest 10 or 20 centimetres. While convenient for large-scale production, this puts constraints on real homes and working environments. A made-to-measure table top, by contrast, is dimensioned to fit the needs of the customer, down to the centimetre.

Key points of contrast:

  • Standard sizing: Predefined sizes, limited variation, not designed to fit specific frames or spaces.
  • Made-to-measure: Adjustable in 1cm increments, compatible with existing bases, adaptable to awkward layouts.

This approach proves especially useful where dimensions are constrained by radiators, alcoves or shared desk configurations. Tablemaker, for instance, regularly produces tops for fixed metal frames, sit-stand desks or irregular spaces where off-the-shelf solutions fall short.

Accuracy in fit helps improve function and longevity. Poor sizing can lead to overhangs that cause instability or bases that interfere with knees. A made-to-measure surface supports how the piece will actually be used, not just how it looks.

Table of Contents

Choosing the Right Size: What You Need to Know

A table top that is correctly sized feels natural in the space and supports its intended use. Whether it is for dining, daily work or collaborative tasks, getting the dimensions right is a straightforward process once you understand the key factors.

Key considerations for sizing

  1. Width and depth For dining and desks, depth affects how much usable surface you have. A dining table should usually allow around 60cm per person along its edge. For desking, 70 to 80cm depth allows for screens and writing. Width varies more but should leave space for movement on all sides.
  2. Overhang and frame fit On most bases, the top should extend slightly beyond the frame for comfort and proportion. Overhangs of 2 to 5cm per side are common. Measure your base first, particularly for metal or sit-stand frames, to ensure compatibility.
  3. Leg clearance and seating If legs are placed toward the ends of the table, legroom becomes important. Think about how many people you plan to seat regularly and whether chairs will tuck under comfortably.
  4. Made-to-measure increments Unlike fixed collections, Tablemaker allows ordering in 1cm increments across a broad size range, which means you can match your existing frame or fit tight nooks without compromise.

Sizing checklist:

  1. Measure your existing base including width between legs.
  2. Consider adjacent furniture or walls.
  3. Decide if overhang is mainly aesthetic or functional.
  4. For shared desks, ensure enough width for each user.
  5. Account for plug access or cable routing if placing against a wall.

A well-proportioned top supports the longevity of the frame and helps avoid common sizing regrets.

Pro Tip: Measure to the nearest centimetre and always check for wall plugs or sockets that may restrict placement.

Pro Tip: Choose a matte or satin finish in family homes or shared spaces to minimise the visibility of marks.

Edge Profiles: Subtle Details That Change the Look

The edge shape of a table top plays a modest but often underestimated role in how the piece looks and feels. It also affects perceived thickness, comfort and how the surface fits with other elements in a space.

Common edge styles explained

Square edge Clean and minimal, this shape has a 90-degree transition from surface to face. It suits modern or architectural interiors. The line is precise and can feel sharp to the touch, which some find less forgiving in high-traffic areas.

Chamfered edge Angled back underneath, this creates a lighter profile when viewed at a distance. It draws less attention to the thickness of the top and blends easily into styles. It’s a popular choice for both desks and dining tables.

Roundover edge Gently softened at the top corner, this profile is comfortable under hand and reduces the chance of chipping on high-use surfaces. It works well in family homes or collaborative environments where touchpoints are frequent.

Each style has its merits depending on context. A sharp edge may suit a minimal interior but feel less forgiving over time. Slight rounding, even if subtle, often improves the lived-in experience.

Tablemaker offers a range of edge options selected during the ordering process. The finish is shaped by hand and sanded smooth to preserve the natural grain and avoid breakage at the corners.

Finish Options: Protection, Colour and Maintenance

The finish of a table top protects the timber, affects how it feels under hand, and defines its visual tone. Selecting the right finish involves balancing appearance, durability and future care.

Why hardwax oil is used

Tablemaker applies hardwax oil as standard to all solid wood table tops. This finish penetrates the wood while also forming a light protective film, allowing the surface to remain breathable and repairable without peeling or flaking over time. It offers a durable middle ground between natural feel and practical resistance to everyday wear.

Appearance and colour tone

The type of oil and number of coats affect colour and grain contrast. Most finishes deepen the wood’s natural grain slightly, but options are available for those preferring a paler or more neutral tone. Satin and matte sheens are more common than gloss due to their ease of upkeep and reduced reflections.

Repair and refinishing

One of the strengths of solid wood finished with hardwax oil is its longevity. Unlike lacquer or veneer, it can be spot-sanded and re-oiled as needed. Scratches and dents can usually be repaired without replacing the surface, which supports long-term ownership.

Upkeep and cleaning

General maintenance requires only a non-abrasive cloth and a mild cleaning solution. No specialist products are needed. Re-oiling every year or two, depending on use, keeps the surface sealed and looking its best.

What to expect:

  • Finish enhances but does not mask the wood’s character.
  • Light routine care is sufficient for most environments.
  • Top can be re-oiled or sanded locally if wear occurs.
  • Matte and satin options hide marks better than gloss.
  • Colour depth varies slightly across boards due to natural variance.

Request a Quote

Send us your dimensions and preferences to get a tailored quote for a made-to-measure table top.

Get My Quote

Delivery and Lead Times: What to Expect

Made-to-measure does not always mean waiting months. Tablemaker produces nearly all orders within two to three weeks at its UK workshop. This pace is maintained by handling production in-house rather than outsourcing or batch manufacturing.

Production and packing

Each table top is built from kiln-dried timber selected for grain and stability. After cutting and gluing, the top is planed, sanded, straightened and finished before packing. Straightening bars are fitted where needed across the underside to reduce movement from humidity changes. Packaging is designed to protect corners and edges, with clear indications for the delivery team.

Delivery process

Once finished and packed, the top is shipped via a UK courier, with most deliveries booked at a weekday time slot. Access notes can be provided during ordering. Tops are usually handled by two-person teams due to weight and size.

For customers close to the workshop, collection is sometimes available by appointment. The dispatch team will advise on safe transport and lifting if collecting personally.

Before delivery:

  1. Measure doorways, stairs or tight passages carefully.
  2. Clear space indoors for unpacking and inspection.
  3. Check that your base or frame is ready to receive the top.
  4. Have two people available to lift, especially for larger sizes.

A made-to-measure top should arrive aligned with its intended use and space, not treated as a decorative object. With proper sizing, protective finish and timely delivery, it is designed to serve as a practical surface for years, with the option to adapt as life or layout changes.

View Edge Profiles

Explore our available edge styles and see how each profile changes the look and feel of your table.

Explore Edge Options

Tablemaker

55 High St, London N8 7QB

02083416334

HVQM+58 London


Posted on

Solid Oak Table Top Cut to Size UK: What to Send for a Quote

Solid Oak Table Top Cut to Size UK What to Send for a Quote-Tablemaker

Solid Oak Table Top Cut to Size UK: What to Send for a Quote

What information should you provide to get an accurate quote for a solid oak table top cut to size in the UK?

To receive a precise quote for a made-to-measure solid oak table top in the UK, you will need to provide detailed information about dimensions, intended use, mounting method, edge and corner preferences, finish, and any site-specific constraints. This enables the workshop to assess material needs, construction approach and compatibility with your space or base.

Table of Contents

Why Accurate Information Matters Before Requesting a Quote

Getting a custom oak table top made to size involves more than choosing dimensions. From a workshop’s perspective, clear details at the outset make every stage smoother, from quoting to production.

For example, consider two quote requests:

  • Enquiry A: “Looking for a desk top around 140cm. Can you quote?”
  • Enquiry B: “Looking for a solid oak desk top, 140cm wide, 70cm deep, 27mm thick, for a sit-stand frame, rounded corners preferred, natural finish, fixing via brackets.”

Enquiry B allows the workshop to give a meaningful quote quickly, including fitting considerations, delivery estimation and suitable finishing. Enquiry A will likely need a follow-up request for more information, which delays the process.

Providing clear and specific details reduces ambiguity, improves accuracy and avoids unnecessary back-and-forth.

Dimensions: What to Measure and How to Present It

Dimensions directly influence production feasibility, fit and cost. Precise measurements are important, especially when fitting to an existing frame or into a defined space.

When measuring:

  • Width and depth: Always provide the finished size required, measured in millimetres. This avoids confusion and ensures alignment with workshop standards.
  • Thickness: Typical thicknesses in UK workshops range from 25mm to 40mm. Thicker tops may be heavier and more expensive, but also offer greater rigidity.
  • Space allowance: If fitting between walls or within a recess, allow for clearance. A snug fit sounds ideal but can lead to swelling issues if timber expands.
  • Non-square shapes: For angled spaces or cut-outs, include a sketch with labelled dimensions.
  • Frame compatibility: If the top must align with a specific frame, measure fixing bracket positions if relevant.

Using metric units helps maintain consistency with most UK-based joinery workshops.

Pro Tip: For snug-fitting areas, subtract 3 to 5 mm from your exact wall-to-wall measurement to allow for wood movement.

Pro Tip: When matching to an existing desk frame, photograph the underside to show bracket layout and avoid misalignment.

Intended Use: Dining, Desk, Commercial or Other

How a table top will be used directly affects construction decisions. Material finishing, joint strength and reinforcement placement can all vary depending on intended function.

Typical scenarios include:

  • Dining tables: These usually require food-safe finishes with strong surface protection against heat and moisture. Rounded corners may be preferred for comfort and safety.
  • Desks (home or office): May need cable allowance, monitor risers or a satin finish that reduces glare. Sit-stand compatibility also affects bar placement.
  • Commercial settings: Tops for cafés or restaurants often need additional reinforcement due to high turnover use. Durability and ease of maintenance are key.
  • Multi-use or shared desks: These may require dual cable channels or modified edge cuts for adjacent seating.

Knowing the use case allows the maker to recommend features that improve longevity and practicality.

Mounting Plans: How the Top Will Be Fixed or Supported

How your table top will be secured matters just as much as its size or timber type. Proper mounting influences both structural integrity and aesthetic outcome.

You should consider and communicate:

  1. Type of base: Is it a fixed frame, a modular desk, trestles or a sit-stand mechanism? Include brand, if available, especially for sit-stand frames.
  2. Fixing method: Will you screw directly in, use brackets, or keep the top floating? Each method has implications for movement allowance and cupping resistance.
  3. Straightening bars: Most solid wood tops include internal or underside bars to counteract warping. Their placement may be adjusted depending on fixing plans.
  4. Undrilled preference: Many workshops, including Tablemaker, supply tops undrilled to let customers align holes precisely to their base. Pre-drilling is possible but should be based on accurate specifications.

Mounting should be taken seriously during planning, not treated as an afterthought.

Request a Custom Solid Oak Quote

Send your dimensions and preferences to receive a precise quote for a made-to-measure solid oak table top.

Get Your Quote

Edge Profile and Corner Preferences

Edge and corner specifications impact visual impression, touch sensation and even safety, especially in households with young children or tight walkways.

Common options include:

  • Edge profiles:
  • Square: Clean and simple, with sharp lines.
  • Chamfered: Lightly angled for a softened modern edge.
  • Rounded: Smooth edge that feels softer to the hand.
  • Corner radius:
  • Minimal radius: Suits formal dining or rectangular aesthetics.
  • Softened corners: Practical for smaller spaces or child-friendly environments.

To specify your preference, you might describe it as “soft profile with rounded corners” or “sharp minimal lines with defined edges.” You do not need to use technical terminology, and plain requests work well when paired with photos or references.

If uncertain, you may request a quick sample or drawing to clarify edge feel.

Finish Type and Colour Preferences

The finish applied to a solid oak top does more than affect appearance. It influences protection, durability and ease of maintenance.

Most UK workshops use hardwax oil as a standard choice due to its practical benefits. This type of finish penetrates the wood while providing a smooth surface that is resistant to spills and heat. It also allows for refinishing over time without needing to replace the whole piece.

When choosing:

  • Colour:
  • Natural: Keeps the original tone of the oak, showing the grain fully.
  • Tinted: Available in light, mid or dark tones. Useful for matching to floors or existing furniture.
  • Finish sheen:
  • Matte: Low gloss, understated feel.
  • Satin: Slight sheen, offers a subtle lift without looking polished.

If colour matching is important, request a small finished sample in your preferred tone.

Any Constraints, Challenges or Special Requests

Unusual situations are common in furniture projects. Sharing them early helps the maker accommodate constraints without need for costly revisions.

Consider mentioning:

  • Fitted spaces: e.g. Between fixed walls or under a window sill
  • Cable needs: e.g. Pre-drilled cable holes or grommet placement
  • Base quirks: e.g. Fixed metal base that limits bracket positions
  • Shared use: e.g. Table shared by two workstations
  • Visual concerns: e.g. Matching an existing leg colour or aligning with nearby furniture

You do not need to send perfect drawings. A phone photo with handwritten notes is often enough to provide context. Sketches are welcome if angles or curves are involved.

Clear communication of these aspects helps produce a top that does not just fit but functions practically in your space.

Speak with a Woodwork Specialist

Unsure about your measurements or finish options? Our specialist team is here to guide your custom order.

Contact a Specialist

Tablemaker

55 High St, London N8 7QB

02083416334

HVQM+58 London


Posted on

Can You Make a Solid Oak Table Top to My Measurements in the UK?

Can You Make a Solid Oak Table Top to My Measurements in the UK-Tablemaker

Can You Make a Solid Oak Table Top to My Measurements in the UK?

What does “to my measurements” mean for a solid oak table top?

Having a solid oak table top made to your measurements in the UK usually means specifying the length, width and, in some cases, thickness to suit your particular space or base. Unlike off-the-shelf pieces, these tops can often be produced in millimetre-specific sizes, giving you tight control over fit and proportion. However, there are real limits imposed by the nature of the material and workshop capabilities.

What Can Usually Be Customised?

  1. Length and width Most solid oak table tops can be made to exact dimensions, with flexibility typically offered in 1cm increments. Whether it’s a 178cm desk top for a sit-stand frame or a 93cm-wide dining surface, precision is part of the service.
  2. Thickness Workshops may offer a small range of standard thicknesses, such as 2.5cm or 3cm, based on what provides stability without excessive weight. Thicker tops can sometimes be made but will involve material and support considerations.
  3. Edge overhang and shape If you are working with an existing frame, overhangs matter. A 3cm edge on all sides is common, but custom tops can tighten or loosen these proportions to suit.

That said, physical limitations remain. Timber boards have maximum widths and lengths based on available stock and how much movement the wood will tolerate over time. It’s helpful to think in terms of the space you have, the base you are using and how the table will behave through seasonal changes. Communicating clear, metric-based measurements early on shortens production time and avoids design issues later.

Table of Contents

How Solid Oak Behaves at Different Sizes

Compared with engineered wood, solid oak is both responsive and resilient. It expands and contracts slightly with changes in humidity and temperature, meaning larger pieces need structural support to resist warping over time.

Grain Direction Boards are laid to run grain lengthwise. This works with the grain’s natural movement patterns and reduces the chance of twisting.

Support Bars For wider tops, especially those over 90cm, straightening bars are fitted across the underside. These hold the surface flat and help resist cupping. Tablemaker uses removable wood or metal bars so the top can adapt to different mounting needs.

Thickness and Weight A thicker piece often means more durability but also more weight. A 3cm oak top across 200cm may require two people to move safely. If the top is going on a lightweight frame, thickness needs balancing with the base’s capacity.

These build decisions are not decorative extras. They form part of disciplined furniture making. Every dimension affects the joinery choices behind it. By understanding how material size, moisture response and structural stability link together, you’re more likely to receive a surface that lasts and performs as expected.

What Affects Lead Time for a Made-to-Measure Oak Top?

Made-to-order furniture does not have to mean long delays. Some UK workshops, including Tablemaker, produce custom oak tops within two to three weeks, depending on specifications.

Timing Factors

  • Measurement challenge Simple rectangle tops move through the queue faster. Curved edges or cable cutouts may increase build time.
  • Finish requirements Oil finishes are usually quicker to apply than multiple layers of stain or lacquer.
  • Frame fit details If the top needs to align with pre-drilled brackets or unusual base shapes, more time is needed for checks and adjustments.
  • Workshop load Production scheduling affects all lead times. Even fast workshops can experience peaks around bank holidays or late-year planning cycles.

Planning ahead helps, particularly if the top needs to arrive before a specific deadline. A clear brief with accurate sizes, finish preferences and base compatibility keeps the process moving efficiently.

How to Ensure Your Table Top Will Fit Your Base

You’ve got the frame, and now you need a top that fits it. Correct sizing is only part of the equation. Compatibility with your base is important for function and safety.

To Do Before Ordering:

  1. Measure overall size Include width and length, but also think about how much overhang you want or can allow. Overhang should not exceed 10 to 15cm without additional bracing.
  2. Check bracket positions If your frame has pre-fitted brackets, measure the distance between them. Share this with the workshop to confirm alignment.
  3. Note any obstructions Crossbars, legs and motor housings under sit-stand frames can create clearance issues. Sketch or photograph the frame underside to help explain.
  4. Decide on drilled or undrilled Desk tops from Tablemaker are usually supplied undrilled, allowing clients to position screws based on their frame. Pre-drilling is only advised when exact bracket positions are confirmed in advance.

Working with the workshop early on avoids mismatches and ensures your base can support the top properly. If you’re unsure, providing photos or a link to the frame model can bridge the gap between standard sizing and real-world fit.

Pro Tip: Ask your workshop if they offer underside straightening bars for larger tops to prevent future warping.

Pro Tip: Request a sample of finished oak if colour tone is crucial, especially for matching existing furniture.

Finish, Edges and Other Customisation Options

Beyond measurements, a table top’s finish and edge profile determine how it complements the space and withstands daily use.

Finish Tablemaker uses hardwax oil as the standard surface treatment because it provides a balance between protection, renewability and a natural feel. Unlike lacquer, which forms a plastic-like coating, hardwax oil penetrates the wood and can be spot-repaired if scratched.

Edge Profile Options often include:

  • Square: clean and minimal
  • Chamfered: subtle slant adds dimension
  • Rounded: softened edges for shared or family use

Colour Tone Oak naturally ranges from pale blonde to warm biscuit hues. Most workshops avoid artificial staining, preferring tones derived from the wood itself and subtle pigments in the oil.

Texture Smooth sanding is standard, though a brushed finish can bring out grain texture with slightly more character under touch.

Many of these choices do not alter lead time significantly, but unusual requests may require extra planning. Most clients stick to clear oil and square or chamfered edges, which suit both domestic and commercial settings.

When a Custom Oak Top Makes Sense, and When It Doesn’t

Custom oak tops are ideal when standard dimensions simply do not work. However, in some cases, a ready-made option may bring the same results with less challenge.

Useful Reasons to Go Custom

  • You have an existing table base with uncommon bracket spacing
  • The piece must fit inside a specific alcove, corner or shared desk environment
  • You want matching tops for a series of built-in or connected units

When a Standard Size May Be Enough

  • The space allows for flexibility and you’re buying the frame at the same time
  • Precise dimensions are not noticeable or functionally necessary
  • You’re working to a tight timeframe or budget

Custom does not mean better by default. In settings where the table may be temporary, frequently moved or sold later, standardised sizing ensures wider compatibility. On the other hand, if you expect the surface to live in one space for many years, getting the sizing right from the start often pays off.

A custom top also holds long-term value through its repairability. Solid oak can withstand daily wear and still be sanded or re-oiled years down the line, extending its use across changes in furniture or layout.

Start Your Custom Table Top Order

Send your measurements and base details to get a no-obligation quote from our UK workshop.

Request a Quote

How to Start the Process with a UK Workshop

Beginning a made-to-measure order in the UK is usually straightforward. A good workshop will guide you through the process and clarify any details that affect the final result.

What to Prepare

  1. Accurate measurements Record your length and width needs in millimetres. Include thickness if known.
  2. Base details Share the type of base or frame you are using. Include dimensions between brackets or special requirements.
  3. Finish preferences Indicate if you want a particular texture, tone or edge profile beyond the default.
  4. Photos or sketches If fitting to a specific space or object, quick photos or basic drawings help avoid confusion.
  5. Lead time considerations Let the workshop know if you have a preferred delivery window.

At Tablemaker, most orders begin with an initial message confirming feasibility, followed by a quote and build schedule. Samples are also available to support finish selection or colour matching. Once confirmed, the top is built, finished and shipped directly from the UK workshop, reducing both transport time and potential damage in transit.

Starting with clear, thoughtful information ensures a better outcome at every stage.

Explore Finish and Edge Options

See how hardwax oils and edge profiles affect the look and feel of your oak top. Samples available.

View Finishes

Tablemaker

55 High St, London N8 7QB

02083416334

HVQM+58 London


Posted on

How to Standardise Mixed Tables in One Venue (So It Looks Intentional, Not Random)

How to Standardise Mixed Tables in One Venue (So It Looks Intentional, Not Random)-Tablemaker

How to Standardise Mixed Tables in One Venue (So It Looks Intentional, Not Random)

How can you make mismatched tables look intentional within one venue?

By coordinating elements such as material, height, surface finish and layout, it is possible to create cohesion without replacing all tables. The goal is to guide the eye through visual consistency, making mixed tables appear deliberate and functional.

Table of Contents

An AI photo of commercial-grade solid oak tables

Understand Why Mixed Tables Happen in the First Place

Mismatched tables are more common than most venue owners would like to admit. They tend to surface over time, especially in spaces that grow, adapt or shift their offering.

Some typical reasons for a mixed table line-up include:

  • Inherited furniture from previous tenants or pre-opening purchases
  • Expansion phases that added tables without revisiting design choices
  • Piecemeal replacement following damage or increased footfall
  • Budget constraints requiring reuse of what is available
  • Layout experiments in response to customer flow or seasonal changes

Left unchecked, these changes create a visual patchwork that feels unintentional. Tablets vary in height, colour, scale or finish, and the result resembles improvisation rather than composition.

By contrast, intentional mismatching can be functional and attractive, but only when it follows a visual logic. That logic does not require identical tables throughout, but it does rely on consistency in the right places.

Choose a Visual Anchor That Unifies the Space

Even with different shapes or styles, a repeated design cue can bring clarity to the room. The aim is not uniformity, but recognisable cohesion.

Common visual anchors include:

  • Consistent timber tone: Choosing tables in the same wood species or shade helps tie together variations in structure.
  • Matching finishes: A uniform oil or lacquer finish across tables makes the surface feel considered, even if the bases differ.
  • Similar leg colour or material: Powder-coated black steel legs, for example, can run across multiple styles and still feel coherent.
  • Edge profiles: A simple square edge or soft rounded finish repeated across tables will subtly link pieces together.
  • Unified table height: Discussed in the next section, but visually relevant when deciding anchors.

Lighting and flooring also affect how well these anchors hold. Tables placed below the same pendant or against the same floor material often read as related. Choose one primary visual connector, then build from there.

Pro Tip: Use a pendant light centred over each table group to draw visual boundaries in mixed table layouts.

Pro Tip: Always compare tabletop sheen levels under venue lighting before committing to a finish.

Standardise Table Heights and Proportions

Height mismatches do more than interrupt visual rhythm. They create functional problems. Guests may struggle to share food or move between surfaces smoothly. Staff may find cleaning or layout shifts more difficult.

To prevent this:

  • Measure all existing tables from floor to top surface. A 2cm difference may seem minor but becomes obvious when tables are adjacent.
  • Assess top thicknesses to balance visual proportions. A thick top on one side and a slim one opposite can look awkward in communal settings.
  • Use discreet risers or adjust bases to align heights. Many cafes and restaurants retrofit feet or select custom bases to correct this.
  • Consider bespoke tops made to match legacy bases. Workshops such as Tablemaker can produce solid wood tops sized and proportioned to fit families of different structures while equalising height and overhang.

Even if styles vary, consistent dimensions create usability and visual unity.

Use a Consistent Surface Material or Finish

Uniform surface material does much of the visual work in a mixed-table environment. Even if legs or shapes vary, our eyes register the continuous plane of a tabletop first.

Points to consider:

  • Use a single wood species for all surfaces. Oak is a common choice for its durability and tonal adaptability across settings.
  • Stick to one finish sheen. Whether matt or satin, the same level of light reflection across tops helps avoid a jumbled look.
  • Refinish existing tops where possible. Hardwax oils can be stripped and reapplied across different pieces, creating a shared finish even on previously mismatched items.
  • Install made-to-measure tops on existing bases that differ. Solid wood tops from workshops such as Tablemaker can unify varied tables while retaining useful features like cable grommets where needed.
  • Watch for uneven wear. Highly used surfaces may dull over time. A periodic refinishing cycle keeps tone and sheen consistent.

Matching tops across tables, even if subtle in difference, is one of the most effective strategies for cohesion.

Group Tables by Function or Zone

Spatial grouping is just as important as appearance. A well-zoned layout creates rhythm and avoids chaos.

Some grouping strategies include:

  • By table size or seating: Keep two-seaters separate from communal styles where possible.
  • By use pattern: If some tables are primarily for laptop users and others for diners, separate these zones to match their furniture styles.
  • By visual similarities: Cluster tables with matching tops or legs closer together.
  • By layout orientation: Tables facing the same direction or lined up in consistent ways will read as intentionally placed.
  • Allowing space between style shifts: Visually different tables can sit closer together if separated by planters, rugs or aisle space.

Sketching a plan of your venue can help to visualise these zones. Grouping by use as well as style often brings both practical and aesthetic clarity.

Plan a Table Refresh with Experts

Get tailored guidance on how to unify your table layout using finishes and custom pieces without full replacement.

Book a Consultation

Repeat Key Details Across Different Tables

Visual repetition works best in small doses. The average guest may not consciously notice each table leg or bevel, but the overall impression of harmony depends on these cues.

Repeatable details include:

  • Edge profiles: A rounded edge or flat chamfer used across several tables is quietly effective.
  • Corner radii: Uniform rounded corners give safety and consistency, especially when pushing tables together.
  • Leg angles or materials: Metal frames, turned wood or tapered legs, and identical, and create rhythm.
  • Top thickness: A uniform thickness looks cohesive even if the tables vary in size.
  • Hardware finish: Using black steel brackets or brushed brass bolts across tables ties disparate styles together.

Workshops can often replicate these details if given an example or sketch. Matching every detail is unnecessary, but repeating one or two across the set increases visual unity without overdesign.

Use Lighting and Accessories to Tie It All Together

Furnishings do not exist in isolation. The surrounding objects can help support cohesion even if the tables themselves differ.

Some accessories that create unity:

  • Overhead pendant lights centred over table groupings help define zones.
  • Identical placemats or runners across different tables offer surface consistency.
  • Coordinated seating such as matching chairs or upholstered benches softens visual variety in the tables.
  • Rugs under certain clusters signal grouping and dampen acoustic difference.
  • Shared tableware or serving vessels offer a unifying layer on the surface itself.

Accessories should not mask or overwhelm mismatched elements. Their purpose is to bridge gaps and reinforce what is already coherent, not distract from inconsistencies.

By planning your layout through function and visual logic, even a varied collection of tables can feel composed and purposeful. Cohesion often depends less on what the tables are, and more on how they are used, arranged and framed.

Custom Table Tops for a Cohesive Look

Bring consistency to your seating with made-to-measure solid wood tops designed to fit your existing bases.

Explore Custom Tops

Tablemaker

55 High St, London N8 7QB

02083416334

HVQM+58 London


Posted on

Commercial Table Refinishing: When Re-Oiling Works vs When You Need a Full Refinish

Commercial Table Refinishing When Re-Oiling Works vs When You Need a Full Refinish-Tablemaker

Commercial Table Refinishing: When Re-Oiling Works vs When You Need a Full Refinish

What is the difference between re-oiling a table and fully refinishing it?

Re-oiling is a maintenance step that refreshes the existing finish by replenishing surface oils, restoring sheen and feel. Refinishing is a more involved process that removes the old finish entirely through sanding, then reapplies a new one. The right choice depends on the condition of the table and the depth of the damage.

Table of Contents

An AI photo of a solid oak desk

Understanding the Basics: What Re-Oiling and Refinishing Actually Mean

Re-oiling and refinishing are often confused, but they serve very different functions. Understanding the distinction is key to protecting, restoring or extending the life of a commercial tabletop.

Re-oiling involves applying a fresh coat of oil, typically hardwax oil or similar, to a table that has become dry, dull or slightly worn. The existing finish remains intact, and the new oil simply fortifies what is already there. It does not alter the surface structure and requires only basic cleaning and light preparation beforehand.

Refinishing, by contrast, means stripping or sanding back the table surface to remove the original finish entirely. This is followed by a complete reapplication of protective oils or coatings. Refinishing addresses more detailed issues such as staining, top-layer discolouration or surface degradation.

A few common misconceptions blur the issue. Surface dullness is often mistaken for finish failure, leading people to overcorrect. Meanwhile, tables with deep damage are sometimes re-oiled repeatedly in the hope that lustre will return, which rarely helps.

Solid wood tables such as those made by Tablemaker respond well to either treatment, provided the right one is chosen. Unlike veneered MDF tops, solid wood can be sanded back several times and still retain integrity, which makes refinishing a viable long-term solution.

When Re-Oiling is Enough: Surface Wear, Not Structural Damage

Re-oiling is suitable for tables that show general signs of use but are otherwise in good condition. High-footfall venues, meeting rooms and cafés often notice stratified wear, where only the top layer of protection has worn away without penetrating the timber below.

A few indicators suggest that re-oiling is likely sufficient:

  1. The surface looks dry or feels slightly rough to the touch.
  2. The colour has faded slightly, with no major staining.
  3. Water no longer beads on the surface but instead soaks in slowly.
  4. There are no deep scratches, gouges or white water rings.
  5. The grain pattern is still visible and not masked by buildup or grime.

Hardwax oil finishes, commonly used by workshops such as Tablemaker, are designed with this maintenance process in mind. These finishes cure into the upper fibres of the wood while remaining workable, meaning they can be topped up locally or across the whole surface.

A simple water droplet test can be useful. If the droplet beads up neatly, the finish is still performing. If it absorbs immediately, a re-oil could be due. In commercial spaces, scheduling this as part of a quarterly care routine can help extend table life without the cost or disruption of refinishing.

Pro Tip: Always clean the surface thoroughly before re-oiling, as trapped debris can affect oil absorption.

An AI photo displaying an oak table being treated

Pro Tip: Re-oil only in controlled conditions with low dust and stable temperatures to avoid uneven curing.

When Re-Oiling Won’t Work: More detailed Damage and Finish Failure

There are clear signs that re-oiling alone will not improve the table and might even trap problems underneath.

Watch for these conditions:

  • Dark stains or rings that have soaked deep into the wood: These cannot be lifted with oil. They require sanding and possibly spot treatment before refinishing.
  • Finish lifting or peeling: Oil cannot adhere to flaking areas and will not restore seal integrity.
  • Sticky or cloudy textures: This typically indicates finish degradation due to cleaning chemicals or moisture, which oiling will not neutralise.
  • Surface scratches that break the grain: Oiling may darken these marks, but it cannot disguise or seal them.
  • Patching or uneven absorbency: If some areas drink oil immediately while others resist, the surface structure has likely broken down.

In each case, sanding back to clean timber is necessary to restore an even, stable base. Repeated layers of oil without preparation can lead to dulling, buildup or uneven finish behaviour.

Surface Type Matters: Solid Wood vs Veneered Tops

Before deciding how to treat a table, it helps to know how it is constructed. Solid wood and veneer behave very differently under oil and sanding.

  • Solid wood: Can be re-oiled repeatedly and sanded back several times. Ideal for long-term use and repair cycles. The grain runs through the full thickness of the board.
  • Veneered MDF or chipboard: A thin wood layer is bonded to a lower-grade core. Sanding through the veneer exposes the substrate below, ruining the surface. Re-oiling is possible but has limited impact if the finish is worn through.

To check what you have:

  • Look at the edge of the tabletop. A continuous grain that wraps over the side typically indicates solid wood.
  • If a different material is visible at the edge or underneath, it may be veneer.
  • Tap the surface lightly. Veneer often sounds more hollow or uniform compared to the more resonant tone of solid timber.

Knowing your surface type helps avoid irreversible damage and allows for appropriate treatment planning.

Frequency and Context: How Usage Patterns Influence the Right Approach

Condition alone does not dictate whether re-oiling or refinishing is right. Usage patterns often matter more, especially in commercial settings.

High-traffic commercial tables, such as those in cafés, restaurants or coworking hubs, and take regular wear from moisture, heat, cleaning agents and constant use. They may require re-oiling every few months and full refinishing on a predictable schedule depending on exposure.

Home dining tables used for family meals and occasional entertaining rarely need refinishing, unless something unusual has occurred. Light re-oiling once or twice per year is often enough.

Desks and worktables, particularly those exposed to laptops, stationery, monitors or hot drinks, develop wear zones. Localised re-oiling may suffice, unless scratching or staining occurs.

Shared spaces can sometimes become over-maintained, with well-meaning intervention doing more harm than good. Knowing whether a stain is superficial or if the finish has reached its useful end helps guide the right response.

Context shapes the right approach far more than surface appearance alone.

Book a Workshop Assessment

Let our workshop assess your table to recommend the best route for longevity and appearance.

Arrange a Consultation

Tools, Time and Skill: What Each Option Involves Practically

The choice between re-oiling and refinishing often comes down to what is realistic given available tools, time, space and experience.

Re-Oiling: What You’ll Need

  • Soft lint-free cloth or sponge applicator
  • Suitable oil (usually hardwax oil or maintenance oil recommended by the original maker)
  • Light abrasive pad or high-grit sandpaper (optional)
  • Clean, dry environment free of dust

Basic re-oiling takes one to two hours including drying time, depending on environment. The process usually involves wiping on the oil, letting it absorb, and buffing off any excess.

Refinishing: What It Takes

  • Orbital sander with dust control
  • Selection of sanding grits (starting from coarse to fine)
  • Vacuum cleaner or air extraction
  • Clean cloths and oil finish system (primer, oil, optional wax)
  • Patience and ventilation

Refinishing is more demanding. Each sanding stage must be thorough and consistent across the surface to avoid patches. Dust must be fully removed. Oil layers may require overnight drying. The process can span several days in total, from prep to cure.

Refinishing is best attempted in a controlled space, not a busy kitchen or dining area. If equipment or confidence is lacking, involving a workshop is often the more efficient solution.

When to Involve a Workshop: Beyond Surface Fixes

Some situations extend well past maintenance and begin to require structural or functional decisions.

Professional workshop support may be warranted when:

  • The table is being resized, reshaped or adapted to fit a new use or frame.
  • Surface issues are paired with movement problems, such as cupping or warping.
  • The original finish or design needs to match new furniture or installation standards.
  • Multiple tables need coordinated attention, common in hospitality renovations.
  • There is long-term value in the piece that justifies proper restoration.

In such cases, workshops like Tablemaker can carry out full resurfacing, structural corrections and waterproofing upgrades. Visible straightening bars can be concealed or upgraded depending on requirements, and bases can be accounted for during redrilling or resizing.

A good workshop will assess what is salvageable, explain the proposed method plainly, and execute with materials consistent with the original construction. For commercial operators, this often means less downtime and a longer interval before the next intervention is needed.

Explore Hardwax Oil Options

Find out which oils are compatible with your table and suitable for commercial upkeep.

View Oil Products

Tablemaker

55 High St, London N8 7QB

02083416334

HVQM+58 London


Posted on

How to Choose Table Tops That Stay Stable Under Daily Heat Lamps and Hot Plates

How to Choose Table Tops That Stay Stable Under Daily Heat Lamps and Hot Plates-Tablemaker

How to Choose Table Tops That Stay Stable Under Daily Heat Lamps and Hot Plates

What makes a table top stable under constant heat exposure?

A stable table top in a heated environment combines the right wood, construction, finish and base compatibility. Solid hardwoods like oak, when joined with precision and protected with durable finishes, provide resistance to warping and discolouration, especially when paired with heat-aware mounting and thoughtful maintenance.

Table of Contents

An AI photo of a solid oak table being treated.

Heat Exposure and Solid Wood: What Actually Happens

Heat changes wood. It may not always be visible straight away, but over time, daily exposure to hot plates and overhead heat lamps can alter how solid wood behaves. Knowledge this helps explain why some table tops warp, crack or degrade while others remain stable.

Here is what happens when heat is applied:

  • Thermal expansion causes the fibres in the wood to stretch. Repeated heating and cooling can lead to distortion or cupping, especially if the grain direction is not aligned with the stress.
  • Moisture loss from heated air or direct contact dries the wood at the surface faster than the middle, increasing internal tension.
  • Surface checking (small cracks) or splits may form, particularly on poorly dried timber or coated finishes that don’t move with the wood.
  • Delamination is common with veneered boards, which separate from their base as heat weakens the adhesive layer.
  • Finish degradation, including bubbling, white rings or discolouration, tends to occur with heat-reactive coatings.

It is worth noting that ambient warmth is less damaging than direct heat. A table under a heat lamp for hours each day, or one that regularly holds hot pans, faces much greater stress than one placed in warm air.

Common misconceptions persist around hardwoods. While oak, ash and walnut are all durable, none are immune to heat improperly applied. Proper construction and finish choices matter just as much as wood selection.

Best Wood Species for Heat-Prone Table Tops

Oak remains one of the most reliable woods under thermal stress. Its density, grain structure and moisture retention balance make it a strong choice for both domestic and commercial settings.

Why oak performs well:

  • Dense and stable grain reduces excessive movement when exposed to fluctuating temperatures.
  • Consistent kiln-drying allows the wood to settle properly before fabrication.
  • Good surface resilience against marking from hot plates or pans.

Other possible choices include:

  • Ash, which is slightly more open-grained than oak but still adapts well when properly treated.
  • Walnut, which offers natural density though costs and softness may limit suitability for very high-use zones.

Softwoods, such as pine or fir, struggle under repeated heat due to lower density and a higher tendency to mark or deform.

Engineered boards with wood veneers should also be approached with caution. These products often delaminate or trap steam beneath surface layers, particularly when adhesive bonds weaken through exposure.

Pro Tip: Position heat lamps at least 30 cm above wooden tops to avoid uneven drying and surface damage.

An AI photo displaying a solid oak cafe table.

Pro Tip: Use rubber grommets between metal bases and wood to reduce heat transmission and stress cracks.

Construction Details That Keep a Table Top Flat

How a table top is built affects its ability to stay flat over time. Material choice is important, but construction errors can still lead to cupping, bowing or cracking.

Several practices support stability under repeated heat:

  • Full-stave boards, which use continuous strips of solid wood joined side by side, offer better long-grain stability than narrow offcuts or finger joints.
  • Straightening bars, made from wood or metal, are fitted beneath the top across the grain. These help counter expansion forces without restricting movement.
  • Grain direction is selected deliberately. Boards should run in a way that disperses tension evenly.
  • Floating components, rather than rigid glue fixings or screws, allow slight movement as wood naturally expands and contracts.

At Tablemaker, full-stave solid oak is used as standard, with straightening bars fitted on the underside of each top. These bars are removable and can be repositioned during mounting, which supports longevity and adjustability.

Edge-glued panels, especially from smaller offcuts or mixed grain directions, tend to struggle in heated conditions. Over time, these may warp even if the surface appears stable at first.

Choosing a Finish That Resists Heat

The final layer matters more than many realise. Even well-built and well-mounted tops can show signs of wear if the finish reacts poorly to daily heat.

Hardwax oil is a preferred finish for heat-exposed furniture. It penetrates the surface rather than sitting as a sealed layer. This allows the wood to breathe and move naturally while offering protection against common forms of damage.

Benefits of hardwax oil:

  • Resistant to peeling or bubbling when exposed to moderate heat.
  • Easy to maintain with spot repairs or full re-oiling.
  • Less likely to show heat rings from cups, bowls or equipment.

By contrast, sprayed lacquers and some polyurethane coatings often harden into layers that crack under expansion or show thermal blemishes.

Warning signs of poor finish performance include:

  • White rings or patches after using hot plates or leaving warm mugs.
  • Flaking at surface edges.
  • Dull or sticky patches where heat has softened the coating.

Tablemaker uses hardwax oil across its range due to its balance of protection and repairability. This keeps tops looking consistent even as they age.

Matching Your Table Top to the Heat Equipment

Not all heat is delivered the same way. Knowledge how your equipment works makes a noticeable difference in surface durability.

Heat-generating elements behave differently based on type, focus and installation:

  • Heat lamps produce radiant heat from above. Over time, they dry the top layer of wood unevenly if mounted too close.
  • Hot plates and warming trays apply direct heat. If left on for hours, they create intense thermal zones that strain grain structure.
  • Buffet setups often combine both, layering ambient and direct heat exposure.

To reduce risk:

  • Maintain sufficient clearance between heat lamps and wood surfaces. Mounting height should allow even dispersal, not concentrated hotspots.
  • Use heat diffusers or insulating pads under any electrical warming equipment that touches the wood.
  • Rotate surface items to prevent permanent heat zones in one area.

For commercial settings like cafés or hospitality counters, consistent awareness of these variables helps avoid long-term damage.

Order a Heat-Ready Table Top

Choose a handcrafted solid oak top built to perform under daily heat exposure across commercial or domestic environments.

View Table Top Options

Good Mounting: The Table Base Also Matters

Even the best top will suffer if mounted too rigidly or on a base that transmits heat inefficiently.

Important points to check include:

  • Allow movement: Solid wood expands and contracts. Fixings should let the top breathe. Expansion slots or floating mountings reduce stress.
  • Metal bases may conduct heat directly into the mounting zones. A thermal break, such as wooden cleats or rubber grommets, improves performance.
  • Flatness and support across the entire surface help prevent sagging or shifting over time.

Pre-drilled tops may seem convenient, but they can limit how the piece integrates with various frame types. Tablemaker supplies desk tops undrilled for this reason, allowing precise positioning based on each base.

A checklist for assessing base compatibility:

  1. Does the mounting method allow for seasonal movement?
  2. Is there a thermal barrier between the base and the underside of the wood?
  3. Are screws or fixings centred in slotted brackets, not tight holes?
  4. Is the support structure rigid across the full length?

Planning for Repair, Maintenance and Change

With regular heat being part of the environment, maintenance becomes an embedded requirement. The advantage of solid wood is that it can be renewed.

Signs that maintenance is needed include:

  • Dull or faded finishes
  • Slight cupping or unevenness at corners
  • Localised surface marks or stains

Fortunately, repair is usually straightforward:

  • Re-oiling restores lustre and re-seals the surface. This is typically needed once or twice a year in high-use areas.
  • Light sanding followed by fresh oil can erase minor scorch marks or heat damage.
  • Adjustable construction, such as removable straightening bars, allows corrections to be made if wood movement appears.

Modular designs also make it easier to adapt the furniture as surroundings change. For example, if a new piece of equipment is larger or hotter, the table top can be rehung or repositioned without complete replacement.

Investing in solid wood made with thermal awareness provides a long-lasting surface that can evolve with needs. With careful pairing and upkeep, even heat-intensive environments can be managed with confidence.

Request Custom Mounting Advice

Ensure optimal performance by getting expert guidance on heat-aware base mounting and top compatibility.

Get Mounting Support

Tablemaker

55 High St, London N8 7QB

02083416334

HVQM+58 London